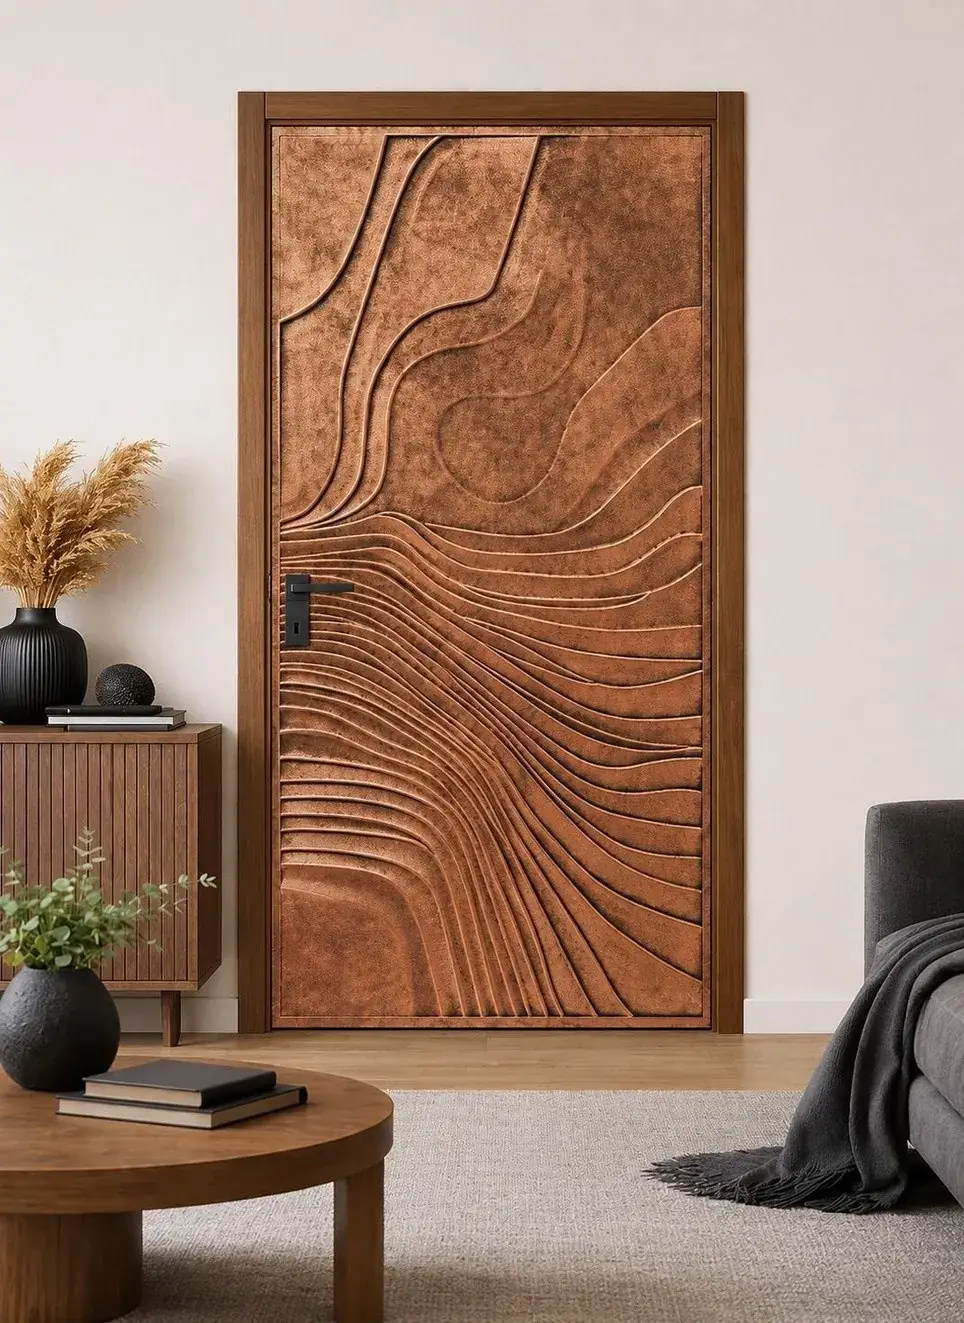
Natural timber grain and carved surface detail

The Icebreaker journal

Material, method
and making.

Project guides, custom-design ideas and practical notes for clients planning carved timber surfaces.

01 · Custom designHow a reference image becomes a custom CNC-carved design 02 · Entrance doorsChoosing a custom carved main door for your home 03 · Feature wallsPlanning a custom CNC feature wall: 6 details to decide first

How a reference image becomes a custom CNC-carved design

A reference image is a strong starting point for a custom project, but it is not yet a production drawing. To create a successful CNC-carved door, wall panel or plaque, the visual idea is first adapted to the final size, material, relief depth and installation conditions.

Start with the reference and the final location

Send the clearest image, sketch or motif you have, together with a photograph of the intended location. We also need the finished width and height, the purpose of the piece and whether it will be used indoors, outdoors or in a covered area. This helps us judge which parts of the design can be retained and which need to be simplified, enlarged or rebalanced.

Scale the detail for the actual size

A flower, border or lettering detail that looks clear on a small picture may become too fine to machine or too crowded when it is placed on a door or a full wall. The composition is adjusted so the focal elements read well from the normal viewing distance and the cutter can produce clean, durable detail.

Confirm material and depth before machining

The chosen board or timber, starting thickness and deepest relief are agreed before the production artwork is prepared. A shallow decorative panel and a deep entrance-door carving require different construction and different tool access. For heritage lettering, the final wording and line breaks are approved in writing before any machining.

Approve the final production brief

Before the CNC work begins, the quote and approved brief should state the final size, material, thickness, carving depth, finish, quantity, packing and delivery location. This makes the project easier to compare, manufacture and install.

Send your idea for a practical proposal

You can begin with a product code from our collection or with your own reference image. Share the dimensions and intended use, and we can advise whether it is best suited to a carved door face, full door, wall panel, relief artwork or plaque.

Choosing a custom carved main door for your home

A main door should suit the architecture, daily use and exposure of the home as well as the chosen carving. The most reliable way to specify one is to begin with the opening and construction, then choose the visual design and finish around those practical decisions.

Confirm the opening and shutter size

Share the clear opening, frame details and required shutter size before choosing a design. This determines whether a selected pattern should be used on one shutter, a double door, fixed side panels or a complete entrance composition. A design is rebalanced for the final proportion rather than simply stretched.

Decide on the construction first

A carved surface can be part of an engineered shutter or a solid-timber construction. The suitable build depends on the door size, weight, exposure to sun and rain, lock position, hinges and intended finish. Solid timber provides natural character, but it must be properly seasoned and built to allow for movement.

Match the carving depth to the face material

Deep carving creates stronger light and shadow, but it requires sufficient material behind the deepest areas. Fine backgrounds can remain shallow while key motifs, borders or a central feature carry more depth. This gives the door a clear three-dimensional effect without overworking the entire face.

Choose a finish for the elevation

A natural or stained finish highlights the grain and handcrafted look. A painted finish creates a more uniform architectural surface and can make the carved lines read from further away. For external entrances, the finish system and maintenance expectations should be matched to the local exposure.

Request a quote with the complete scope

For a useful quotation, send the desired design or product code, final dimensions, quantity, city, material preference, finish, hardware requirements and whether a frame or installation is required. We will use this information to recommend a practical carving and build specification.

Planning a custom CNC feature wall: 6 details to decide first

A custom CNC feature wall works best when it is designed as part of the room instead of as a pattern selected in isolation. The same relief can look very different depending on the dimensions, lighting, finish and how the panels meet at their edges.

1. Measure the complete wall

Share the full wall width and height, including doorways, windows, electrical points, television locations and any skirting or ceiling details. This allows the pattern to be scaled and the panel joints to be planned in quieter parts of the design.

2. Choose the right visual direction

A long horizontal design can make a room feel wider, while vertical fluting can add height. Deep floral relief, geometric panels and louvers each create a different character. Reference images and a room photograph make it easier to select a direction that suits the space.

3. Specify the room conditions

Dry interior rooms may suit an MDF-based build, while a more humidity-resistant board can be considered for other protected interior conditions. The wall substrate, access for fixing and expected moisture all influence the final panel construction.

4. Set the relief depth and panel thickness

A shallow pattern can create a refined shadow line; a deeper relief makes a stronger focal wall. The production brief should always state the starting face thickness, deepest CNC removal and the material remaining behind the carving.

5. Plan lighting and finish together

Side lighting shows carved depth more clearly than flat front lighting. Paint, stain, veneer and clear polish all affect how the detail reads. Choosing the finish alongside the pattern prevents surprises after installation.

6. Request an itemised proposal

Send the wall photograph, dimensions, preferred style, colour direction and city. We can then recommend a panel split, material, depth, finish and fixing approach for a made-to-measure CNC wall design.

Planning a Custom Carved Wooden Door

A custom carved wooden door is planned around the finished size, door construction, timber or board specification, carving detail, finish, hardware and delivery location. Two doors that look similar can require very different materials, machining and site preparation.

Start with the finished size

For a made-to-order door, the workshop first confirms the clear opening, finished shutter size, frame, stile-and-rail construction, and whether the design is a carved face or a complete door assembly. The approved dimensions and build-up guide the final production drawing.

Material defines the build

An HDHMR carved face, a laminated engineered build and a seasoned solid-timber construction are not equivalent products. Solid timber requires selected stock, seasoning, joinery that allows for movement and finishing suited to the installation. It is normally specified as a premium construction, especially for an entrance door.

Detail and relief depth affect machine time

Fine linework, deep relief, undercuts, borders and large hand-finished areas take longer to route, clean and finish. A design can use a quiet background with deeper focal details to keep the artwork clear while protecting the face material.

Finish, hardware and delivery are separate decisions

Colour, stain or polish, hinges and locks, frame work, delivery, taxes and installation are confirmed separately because they depend on the actual project.

Request a complete written quotation

Send the product code or reference image, finished width × height, quantity, intended location, preferred material, finish and city. A useful written quotation should confirm material, thickness, carving depth, scope of finish, packing, delivery and expected production window.

CNC carved wall panels for homes: material, depth and finish

A CNC carved wall panel can make a living room, entrance, bedroom or prayer space feel more considered, but the best result begins with the wall conditions—not only the pattern. Before selecting a design, decide the wall size, lighting direction, moisture exposure, intended finish and whether the panel will be viewed closely or from across the room.

Choose the board for the room

MDF is suitable for many dry interior walls and gives a consistent machined surface. HDHMR is a more suitable option where humidity is a concern. For a large wall, the backing and fixing method matter as much as the carved face, because they keep joints level and control movement over time.

Match relief depth to the panel thickness

Relief depth is the amount the CNC removes from the starting face. A shallow 3–6 mm relief can create strong shadow lines on a feature wall. Deeper relief needs more starting thickness or a laminated build so sufficient material remains behind the carving. The production drawing should state the face thickness, deepest removal and remaining material.

Plan the panel joints before machining

Large designs are normally divided into practical panel sizes for machining, transport and fixing. The panel joints should follow the pattern or sit on quiet areas so they are less visible. Final widths, heights and the wall elevation help the workshop position those joints correctly.

Let the finish support the carving

A painted finish makes the geometry and shadows read clearly. A stain or clear polish brings out natural grain but also makes material variation more visible. Light from the side of the panel creates the strongest relief shadow; front lighting makes a deep carving look flatter.

Give the workshop a complete brief

For an accurate proposal, share a wall photograph, total width × height, room type, any electrical points, preferred colour or wood tone, and the city for delivery. The workshop can then recommend the face material, backing, relief depth, panel split and installation approach.

Sikh Heritage wooden plaques: wording, material and carving depth

A Sikh Heritage plaque is most successful when the message, iconography and material are approved before machining starts. Whether the design features Ik Onkar, Khanda, a gurdwara reference, historic figures or a Gurmukhi line, the final lettering and line breaks should be treated as part of the artwork—not added after the carving has begun.

Approve the wording exactly

Provide the final Gurmukhi wording as approved text, ideally along with a reference for the intended line breaks. This prevents spelling changes, incorrect character spacing and last-minute changes to the carved composition. Religious symbols and figures should also be confirmed in the final artwork.

Use a stable carved construction

For interior display, a carved HDHMR face on BWP plywood backing provides a stable practical build. A typical Heritage plaque can begin with an 18 mm carved face, with the deepest areas planned so adequate material remains behind the design. Solid wood can also be quoted when natural grain and a premium timber finish are required.

Design the depth for clarity and strength

Text, borders and symbolic details need a clear difference between the raised face and recessed background. For many plaque designs, a 6–8 mm maximum relief in an 18 mm face creates visible depth while retaining 10–12 mm behind the deepest carved area. Final depth depends on the exact artwork, cutter and material.

Select a finish for the setting

Dark walnut stain with a protective clear polish gives carved detail strong contrast. A lighter natural finish can reveal more grain, while a painted finish can improve readability for intricate lettering. For any installation near moisture, sunlight or high handling, the coating and mounting should be specified for that exposure.

Confirm the size and mounting method

Before production, confirm the finished size, display location and mounting method—such as keyholes, a French cleat or concealed fixings. The final weight and wall type determine the safest fixing. A written quote should include the approved artwork, material, relief depth, finish, packing and delivery destination.

What makes a carved front door feel substantial?

A heavy-looking entrance is not created by thickness alone. The finished impression comes from the relationship between the door construction, carving depth, edge profile, hardware and the scale of the opening.

Begin with the complete door construction

A 32 mm carved face can be appropriate as one part of a properly engineered shutter, but it should not automatically be treated as the complete structural thickness. The final build must account for the frame, stiles and rails, locks, hinges, weather exposure and the weight the hardware can safely carry.

Allow for movement

Wide solid boards respond to seasonal moisture. Stable, well-seasoned timber, sensible board widths and construction that permits movement matter more than simply choosing the heaviest species available.

Use depth selectively

Deep relief is most effective at focal areas. Quieter background fields preserve strength, reduce machining time and keep the design readable from a distance.

Final door thickness and joinery should be approved for the actual opening, exposure, hardware and timber moisture—not copied from a photograph.

Solid timber or engineered carving board?

The right substrate depends on where the work will be installed, how deeply it will be carved and how the final surface should look. There is no single material that is best for every application.

Choose solid timber when

  • Natural grain and edge detail are central to the design.
  • The construction can accommodate timber movement.
  • The budget supports seasoned stock, machining and finishing.

Choose an engineered board when

  • A large, stable painted or veneered surface is required.
  • Repeatable CNC detail and consistent thickness are priorities.
  • The application is protected and the specified board suits its moisture conditions.

Finish is part of the material decision

Clear finishes reveal grain variation. Pigmented finishes create a more uniform architectural plane. Veneers can bring natural character to a stable core, but carving depth and edge treatment must be resolved before production.

Material recommendations should always state the board or timber species, finished thickness, exposure, carving depth and approved finish.

Face thickness, relief depth and remaining material.

These three measurements describe different parts of one carved face. Keeping them separate makes quotations clearer and reduces production mistakes.

Face thickness

The starting thickness of the material before carving. For example, an 18 mm face begins as a full 18 mm board or timber layer.

Relief depth

The maximum amount removed from the original face at the deepest carved point. If the CNC removes 8 mm from an 18 mm face, the maximum relief depth is 8 mm.

Remaining material

The material left behind the deepest carved area. In that same example: 18 mm starting face minus 8 mm maximum removal leaves 10 mm behind the carving.

Example: Starting face: 18 mm · deepest CNC removal: 8 mm · remaining material: 10 mm. This is a planning reference; the router-ready toolpath still depends on the final artwork, dimensions, cutter and material.

Have a technical question?

Bring us the drawing, dimensions or reference.

We can help turn the design intent into a practical material and production brief.

Ask the studio